Using Quibbler with Jupyter lab
Quibbler provides several user-interface functionalities available when working within within the Jupyer lab environment:
Save/Load quib assignments within the notebook*.
Integrated Undo/Redo buttons*.
View and edit quib properties, assignments and value.
Display a quib-dependency graph.
* The two first features require the pyquibbler-labextension (see
installation below).
Installing the Jupyter lab Quibbler extension
To install the pyquibbler-labextension, first make sure you have
installed Jupyter lab (pip install jupyterlab). Then simply
install the extension with:
pip install pyquibbler-labextension
Note. Using Quibbler in Jupyter lab does not require the Jupyter lab extension. All the power of Quibbler including interactive graphics etc works independently of the Jupyter lab extension. The extension only provides the additional functionalities of save/load into the notebook and the integrated undo/redo buttons.
Fire it up
Now you can start your Jupyter lab (jupyter lab at the terminal).
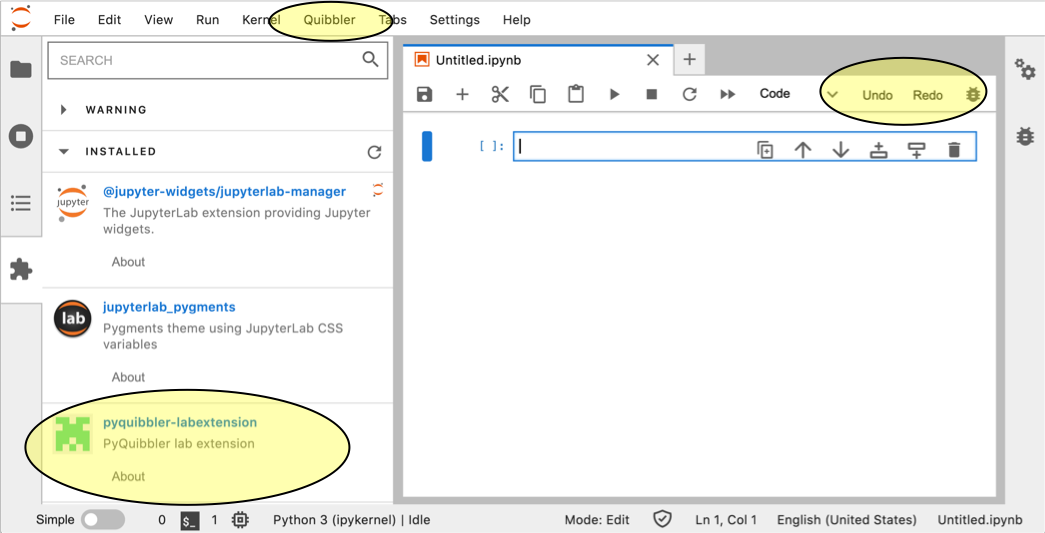
In the Jupyter lab window, you will see the pyquibbler-labextension
listed in the Extension Manager (on the left). You will also see two new
buttons for Undo and Redo, as well as a Quibbler menu above.
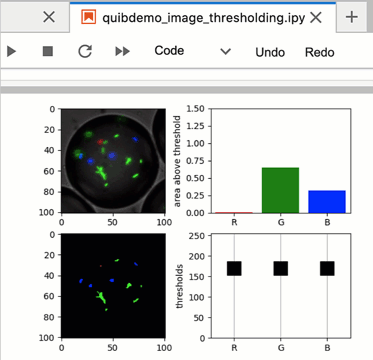
Undo / Redo
The Undo and Redo buttons at the top of the notebook function to
undo and redo quib assignments. Hitting these buttons is the same as
executing the undo() and redo() Quibbler functions.
Here, for example, is how these functionalities behave when running the demo Simple quib-app for image thresholding:
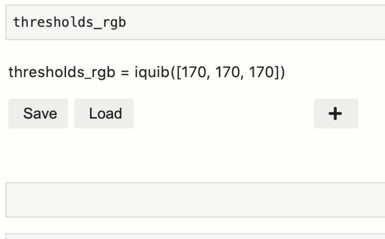
Viewing and editing quib assignments
Quibs are displayed in Jupyter lab as interactive “Quib Editors”. To display a given quib, simply execute its variable at the end of a Jupyter lab cell:
In the Quib Editor, override assignments are listed as lines of assignment text.
Graphics-driven assignments
Interaction with graphics is inverse propagated to override upstream quibs. Such graphics-driven assignments can be viewed, in real time, in the Quib Editor.
Manual assignments
Overriding assignments can be made manually by entering the path and
value of the assignment. The assignment path can be any Python
acceptable syntax, like [1] for list or arrays, [3,:] for
arrays, or ['year'] for dicts. Deep assignment paths are also
allowed, like [0][2]. For example, to override the value of a list
quib at element 2 with a new value 97, add an assignment text: “[2] =
97”.
To make an assignment that replaces the whole quib value (equivalent to
assign()), do not specify a path, just type in the new value
for the quib directly (e.g., “[2, 3]”), or append it with an equal sign
(e.g., “= [2, 3]”).
New overriding assignments can be added by pressing the + button.
Assignments can be removed by pressing the circular - button on the
right of each assignment. Removing an assignment leads to the quib
resuming its default value.
Saving quib overriding assignments into Jupyter notebook
Overriding assignments to quibs can be saved as part of the notebook, allowing restoring prior values both within the session and when restarting the notebook as a new session. In chapter Project save/load, we reviewed how quib assignments can be saved into external files. The Jupyter lab extension allows us instead to save quib assignments into the notebook, which is typically much simpler and convenient. To enable saving quib assignments into the notebook check the “Save/Load inside Notebook” option in the Jupyter lab Quibbler menu.
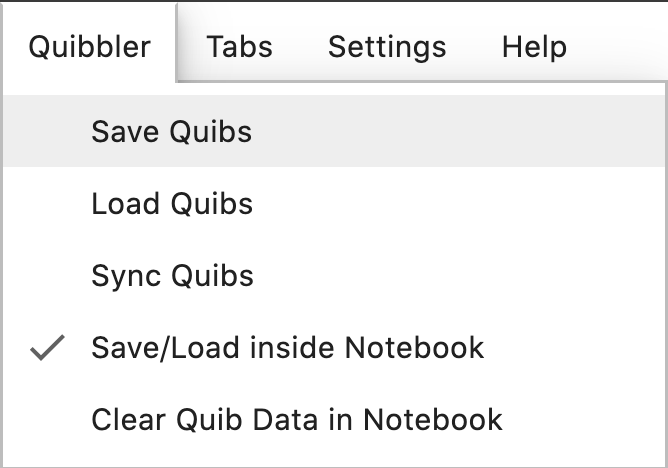
Once enabled, quib assignments can easily be saved/loaded, either
globally for the entire notebook by choosing Save/Load from the
Quibbler menu (equivalent to save_quibs(), load_quibs()), or
individually by clicking the Save/Load buttons at the bottom of the Quib
Editor of the relevant quib (equivalent to the quibs’ methods
save(), load()).
Note. Hitting the Save button will both save the quib assignments into the notebook and save the notebook to file.
Quibs assignment data can be inspected in the notebook metadata. To
view the saved quib assignments, click on the double gear icon at the
top right of the notebook. This will open the cell and notebook metadata
editor. The quib assignments are saved in the quibs_archive field of
the notebook metadata.
Display a quib dependency graph
Within Jupyter lab, we can use the dependency_graph()
function to display the network of quibs upstream/downstream of a given
focal quib.
See Quib dependency network for more detail and an example graph.